A Penny For Your Thoughts
A web project that literally pays members of the Mechanical Turk elastic workforce one cent for any thought s/he shares
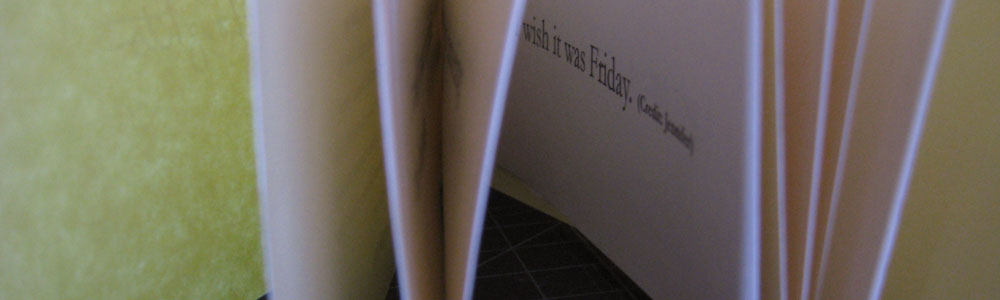
After collecting more than 150 thoughts (and while the project continues to grow), I dedicated a Wordpress Blog to the Turkers' thoughts. In addition to this online venue for thoughts, I also organized the collected thoughts into individual booklets based on recurring themes. The first booklet is titled “work”.
About the booklets
The file is organized into a 24 page 10 by 3 inch book (approximately 4.5 inches wide when folded in half and trimmed) with a saddle stitch (staple through the spine). Follow the instructions below - you can download the PDF files to print and you can even download my InDesign files if you want to see or redesign the layout. For more information about designing and producing an InDesign file, use Chapter 17 of my textbook, Foundations of Digital Art and Design.
Instructions for printing and assembly:
1. Download the PDF file of your choice (or grab all of them!). There are five books: work, economy, life and how to live it, domesticity and love, and the first book of random texts (I imagine this will be popular). Or, download all five files. Open it in Acrobat, Preview, or whatever application you use to read and print PDFs. If you just want to print, move on to step 2; but if you are a designer and you want to redesign the books, you can have all of my InDesign files, too.
2. Find 12 sheets of standard sized (such as letter-size, or 8.5 by 11 inches) paper you want to use for printing the inside of the book and 1 sheet of paper for the cover. Also, have a few test sheets of paper on hand (plain, white paper is fine). The cover is hand-made, and it's very easy to do. First, we'll focus on the hard part - the inside of the book. Printing might be the trickiest part of this process. The pages are arranged so that they need to be printed on the front and back of each sheet of paper. The PDF is 12 pages in length, set in "spreads." Two pages of the book are printed on the front of each side of a sheet of paper and two book pages are printed on the back of each sheet of paper, so that when the paper is folded in half, the result is four individual pages of the resulting book. In other words, you will make a 24 sheet book by printing on the front and back of 12 sheets of paper and then folding your sheets in half. (Actually, then you'll add a cover, so the real page count is 26).
3. Load a few test sheets of plain paper into the printer. From your application (Acrobat, Preview, etc.), choose File > Page Set Up to determine that you will print on letter-size paper in landscape (or wide) format. The document is much less than 11 inches tall, but it is 10 inches wide (more than 8.5 inches). Click "OK".
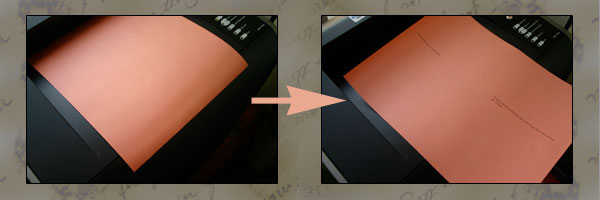
Pause for a moment, and figure out how to flip your paper:
Here is the tricky part. On my printer, the print happens on the down-side of the paper loaded into the tray. When the page comes out of the printer, it's face is down (meaning, I am looking at the back of the print). In order to print on the other side of the paper, I have to turn over the page that comes out of the printer. When I am looking at the printed page, I then rotate the page 90 degrees and load it back into my printer drawer. I know this because I have tested my printer. I loaded a page into the printer with an arrow drawn on it indicating the part of the page going into the printer. After a few tests, I was able to figure out how to flip my page over in order to make the print on the back of the paper successfully. Of course I ended up with an upside-down print on the back of the page before I had it all worked out. You only have to test your printer for this once. When you figure it out, it won't change (that is, maybe until you decide to purchase a new printer!).
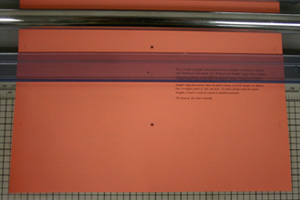
4. Choose File > Print and use the dialog box to print from page 1 to 1, indicating that you will only be printing page 1 of the 12 page file.
5. Page 2 includes an intentionally blank pages on one half of the side. After printing page 1, flip the page however you need to and choose File > Print. Send pages 2 to 2 to the printer (meaning, print just page 2 on the back of page 1).
6. Now that you are printing on both sides of the paper with confidence, run the rest of the pages through the printing process. I recommend printing each page one at a time, and paying attention! It is easy to lose track of which page you are printing, especially if you don't do this too frequently. Print pages 1 to 1, flip the paper, load it back into the tray, then print 2 to 2. Repeat for the sets 3 and 4, 5 and 6, 7 and 8, 9 and 10, and 11 and 12.
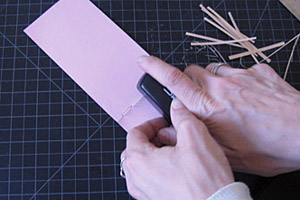
T rimming pages on a cutting board.
Removing creep with an exacto kife.
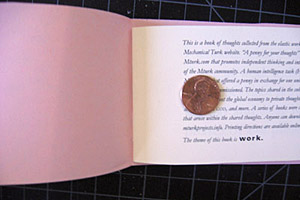
Cut a sheet of paper for the cover, fold it around the book and open the book to the center spread.
Place the book with the spine facing you and open your stapler.
Here you can just barely see that my staple is pierced through the pages, but remains sticking up. After two staples are punctured, I picked up the book, pushed the staples all the way through and then flattened them on the fold at the center spread.
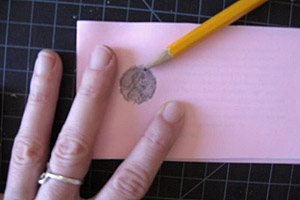
Placing the penny on the first page of the book, beneath the cover, in preparation for the graphite rubbing.
Here is what the graphite rubbing will look like on the cover.
7. Notice that the first page includes crop marks. Use these marks as guides for trimming the pages. The easiest way to do this is with a paper cutter - I used one at the school where I teach; but if your office or school doesn't have one, Kinkos does! If you don't live near a Kinkos, you may have to use your exacto knife to trim the pages individually, but it's worth the trip to Kinkos or an office supply store to trim the pages together. Line up the pages and fold them in half to create the booklet. Then open the booklet and trim along the marks, creating a book that is about 3 inches by 10 inches (5 inches when folded in half). Depending on the thickness of your paper, you may have to trim just a few sheets at a time.
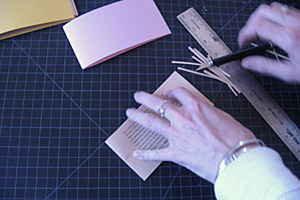
8. Once the pages are trimmed, fold them again to inspect your booklet. You will need to remove what is commonly known as "creep," as the edges of the folded pages creep outward. Trim the edges of the pages with an exacto knife so that they are even.
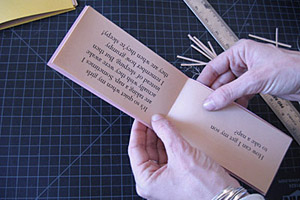
9. The cover is the next task. First, cut a new sheet of paper of your choice so that it is just a little bit larger than your book. I used a sheet of paper in a different color from the pages of my book. Line up the cover with your book and fold it in half, then open the book so you are looking at the center spread.
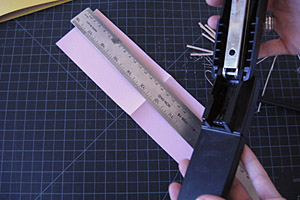
10. Place the open book with the pages down and the spine of the book facing you. You will bind the book by inserting two staples into the spine - this is called a saddle stitch (or saddle staple). You can also sew the spine with a needle and thread if you'd rather take the time to stitch it. Using the stapler like this works best on a soft surface, such as a cutting board, an ironing board or a carpet, and even then you may have to try it a few times. This will be more difficult on a hard surface, such as a desk. Open your stapler and push two staples into the spine. The staples will not go all the way through the page and fold, but they will pierce the page and stick up.
11. Carefully lift up the book and push the staples all the way through the paper. Turn the book over and push down the staples.
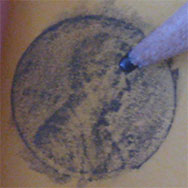
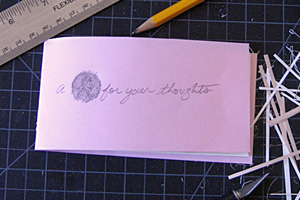
12. Now that the book is bound, we'll make the cover. This part is easy. The cover is a graphite rubbing of a penny, with penciled (or inked, however you want to do it) letters that read, "a (penny rubbing) for your thoughts." Place a penny beneath the cover then rub over it with the edge of a pencil. You can see the illustration to the left for placement of the penny.
13. Rub over the penny with your pencil and watch as the face of the penny appears on the cover of your book in graphite. Then write in, "a" before the penny illustration, and "for your thoughts" after the illustration.